The 7 Golden Rules of Player Piano Restoration

1. Don't forget to restore the piano when restoring the player. It will only ever sound as good as the piano it is in.

2. Study the component or entire mechanism, to understand how and why it works, prior to full dis-assembly.

3. Only use Hot Hide Glue on non-structural components. No other glue performs in the same manner.

4. Only use correct materials purchased from a reputable player piano restoration supplier. Raincoats, cling wrap, white glue and sticky tape are out.

5. Have patience, a lot of patience, if it does not seem right, do it over.

6. If in doubt, ask. There are many experienced suppliers and re-builders who take pleasure in assisting the novice. You can find them in a multitude of web groups and in their own business's.

7. Enjoy the tasks, the reward is certainly worth the effort.


 High quality repair/restoration is extremely important when restoring player pianos. Player pianos are an irreplaceable artefact
of the last century, and must be treated with traditional methods, and at least as much care, as was exercised by the original
manufacturer:

The player piano is in no way miraculous, it is a complex machine certainly, but perhaps the true wonder of it, is that we are still able to closely replicate the materials and techniques required to repair and restore them, (even though the art of manufacturing them is long since gone) to the original standard of quality.


Cleaning your new aquisition:

IMPORTANT: As your health is the most valuable thing you'll ever have, it is extremely important that you take precautions to protect yourself when cleaning out an old player piano. You have no idea what has been in the piano, what poisons, bacteria and viruses lurk in the accumulated dust of up to a century. Therefore, always wear gloves. Always wear a dustmask when using a compressor or duster to clean the nooks and crannies.  Vacuum as much as is possible inside the piano to reduce the volume of debris that can become airborne. Most washable surfaces can be cleaned with a mild water and vinegar solution with a damp cleaning cloth.


Be careful when polishing nickle plated metal components, that you don't polish right through the plating. Most plating is exceptionally thin and if it is breaking down, you might consider re-plating, particularly if the item is on display in the spool box. (Cost of re-plating is reduced dramatically by removing the old plating and highly polishing the base metal, before submitting the item for re-plating).
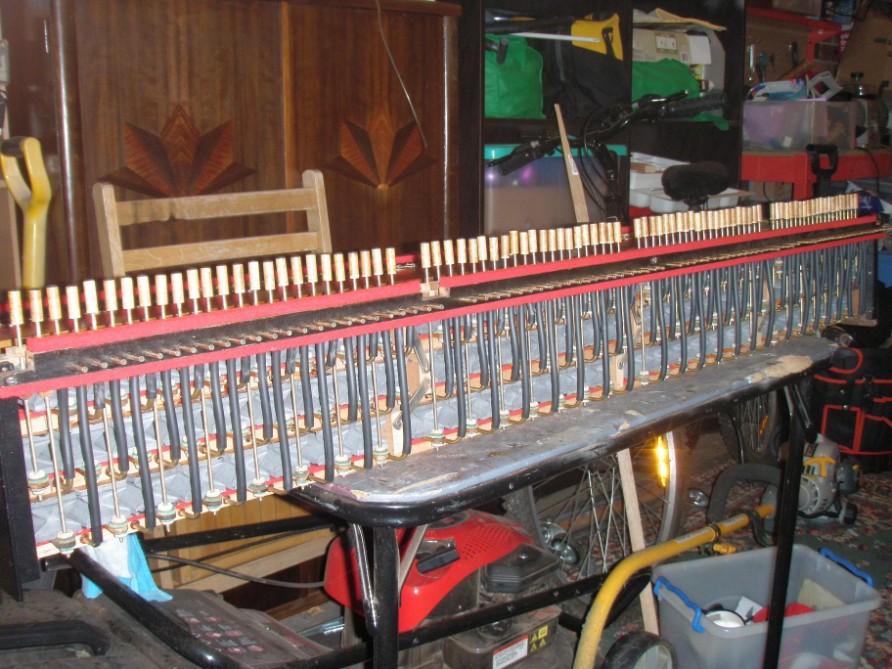
Pneumatics:
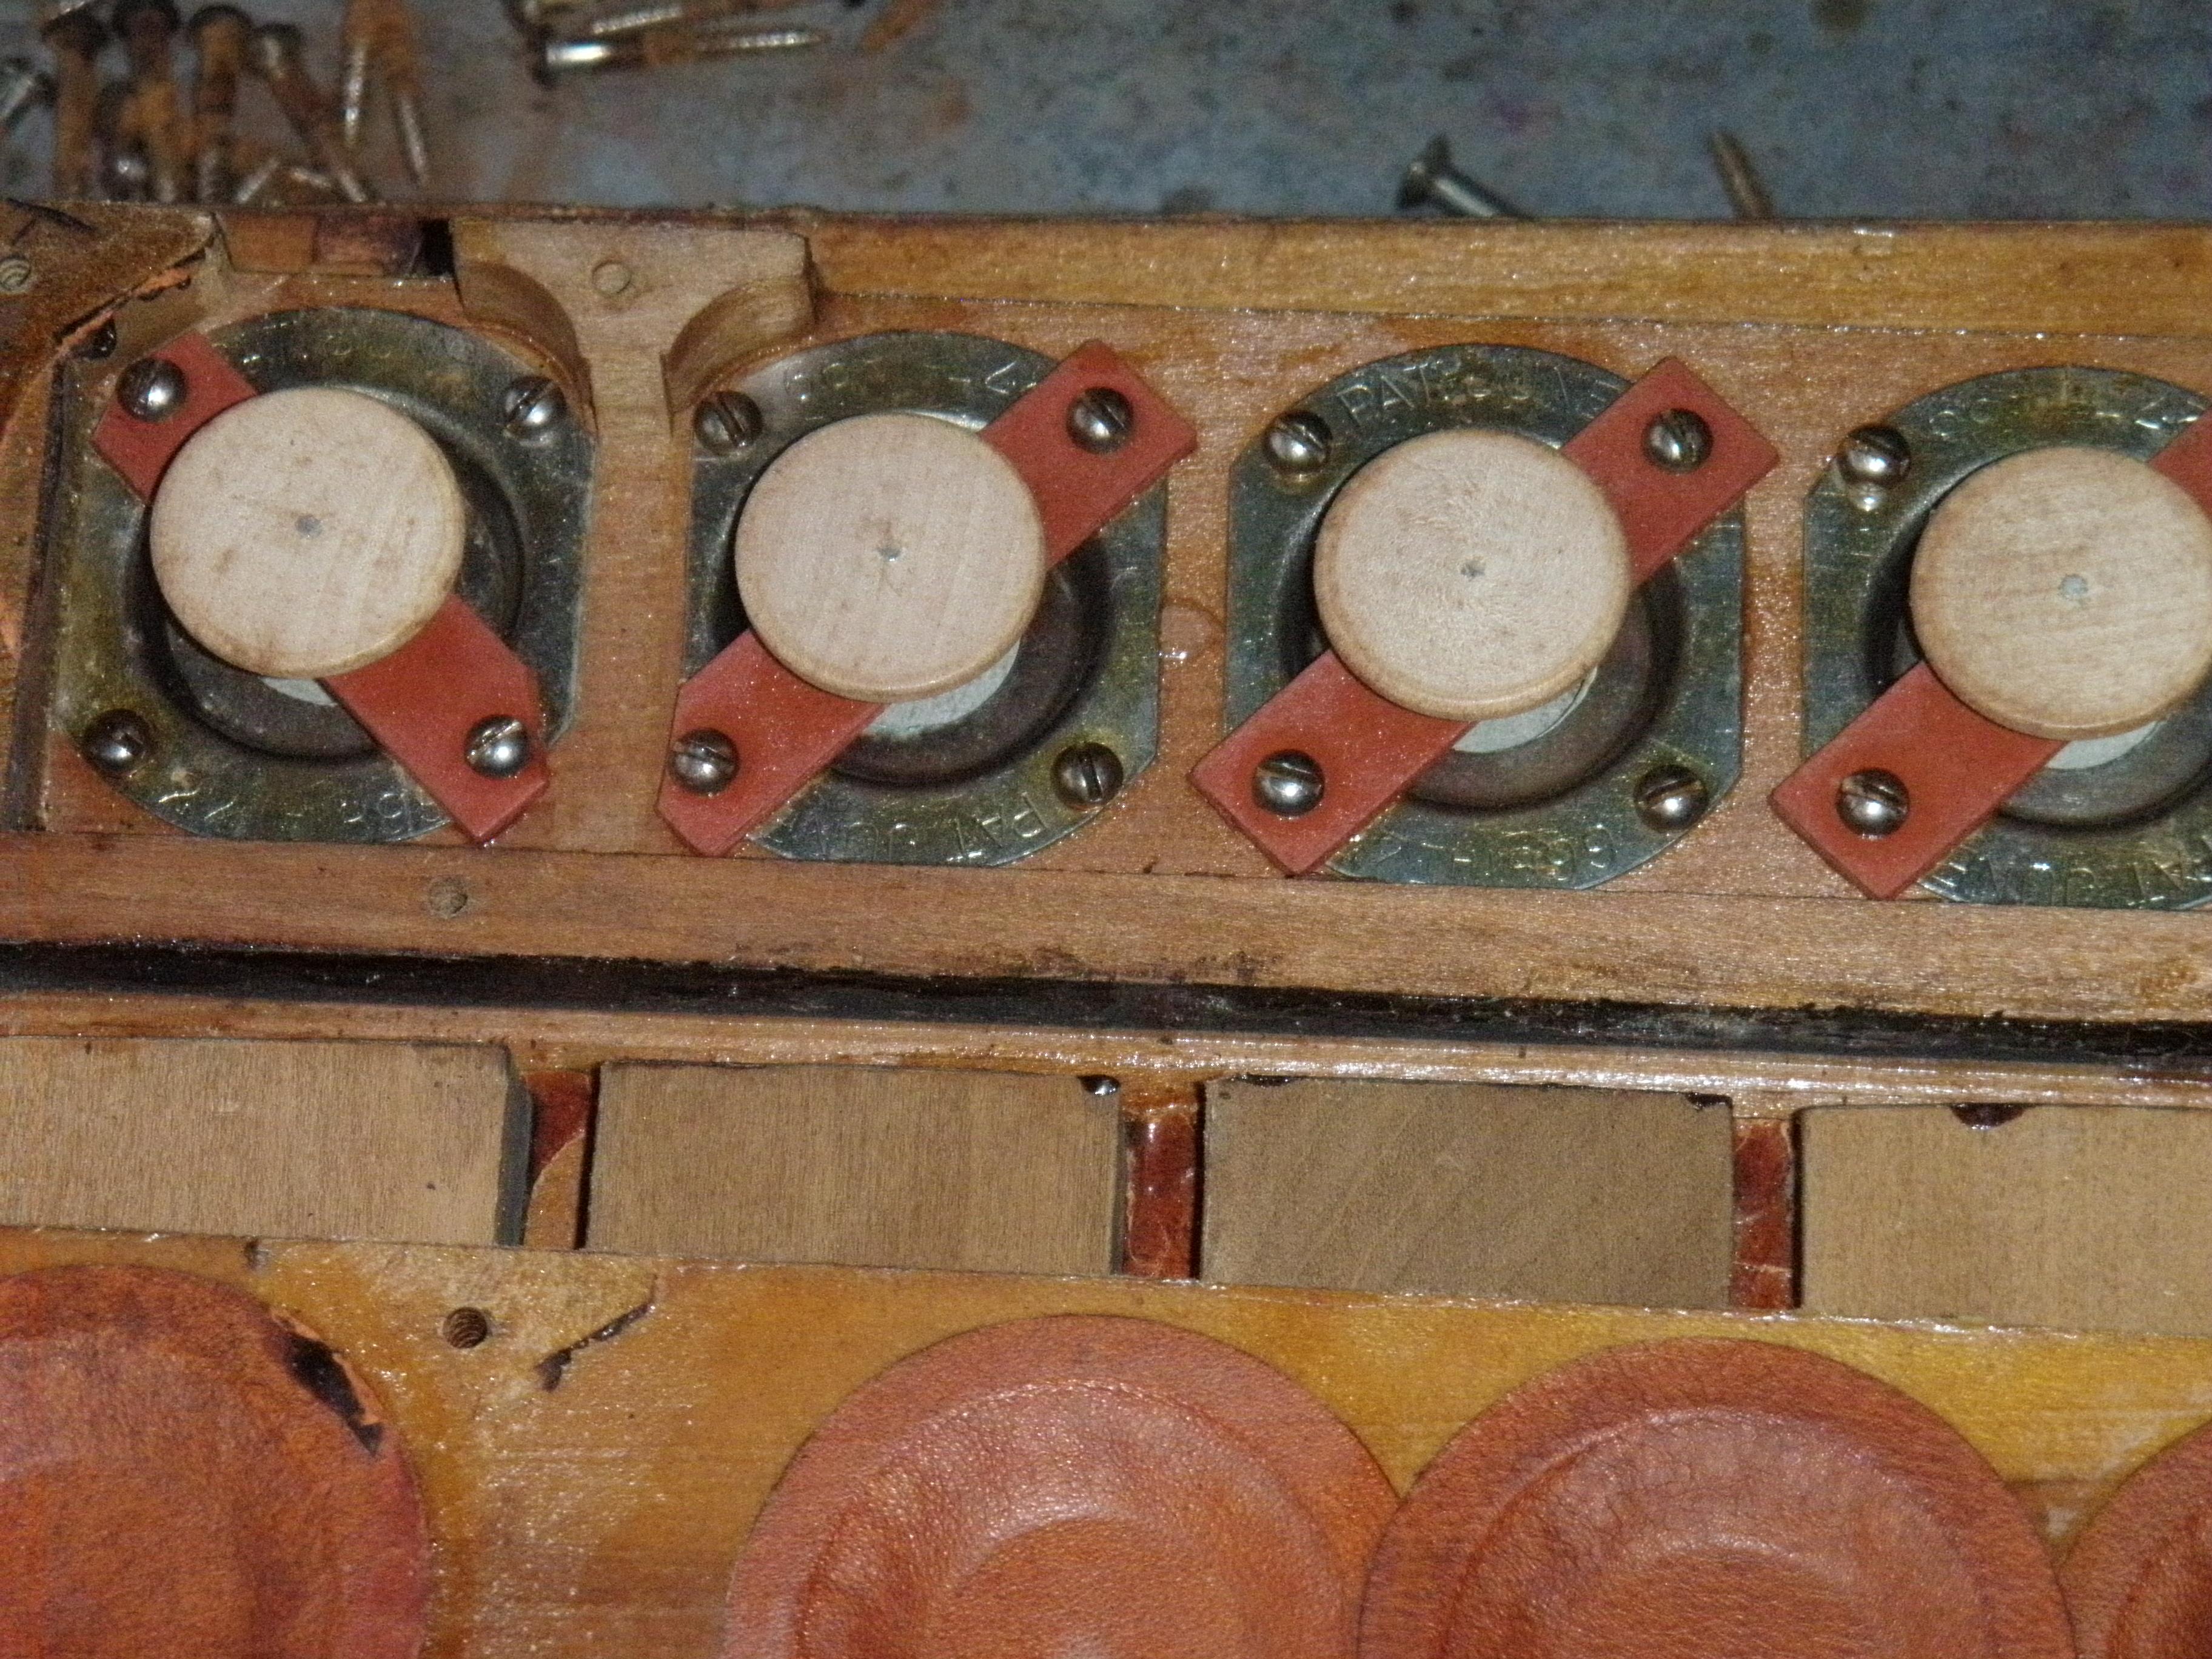
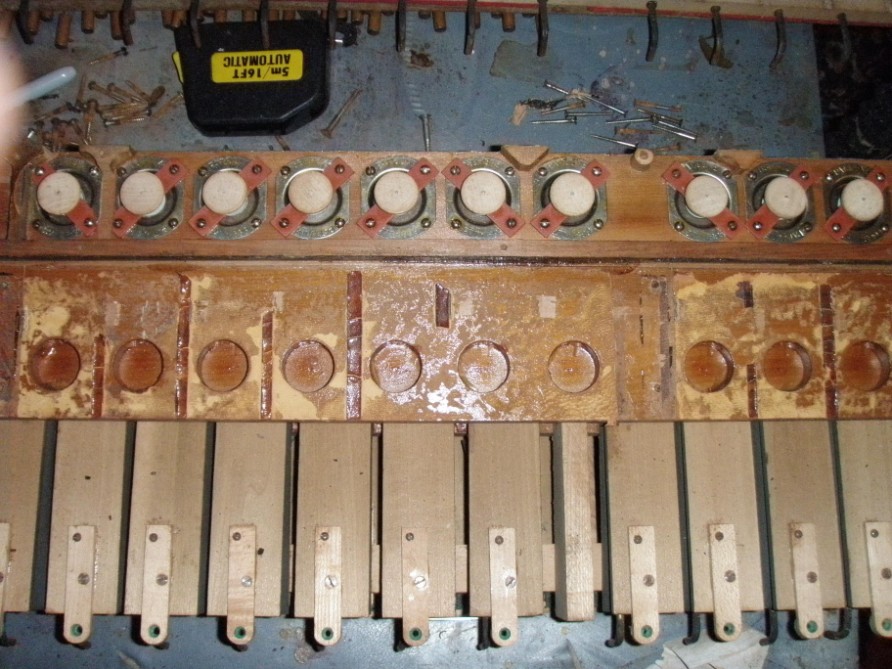
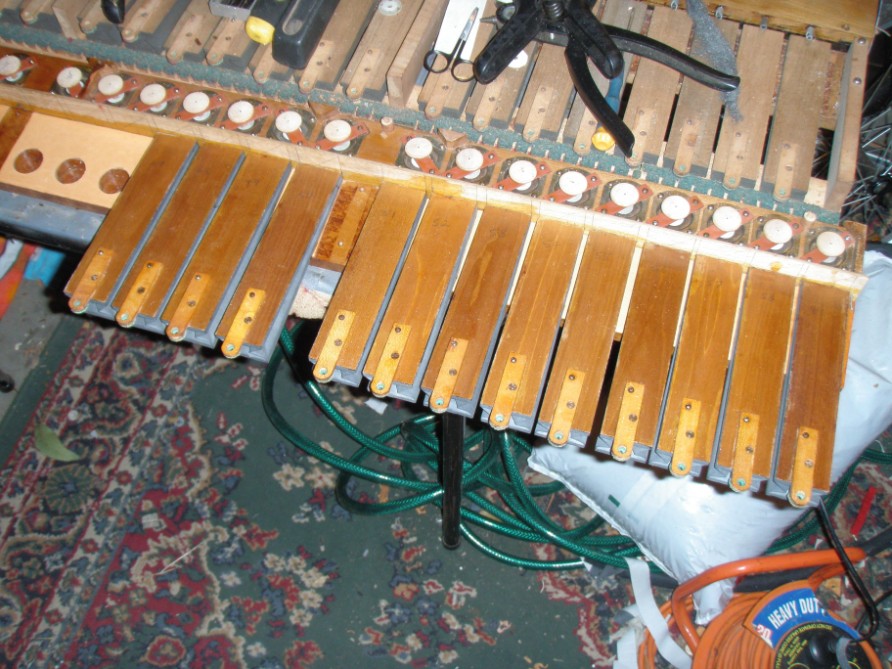
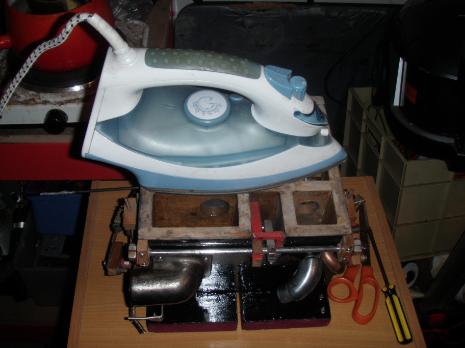
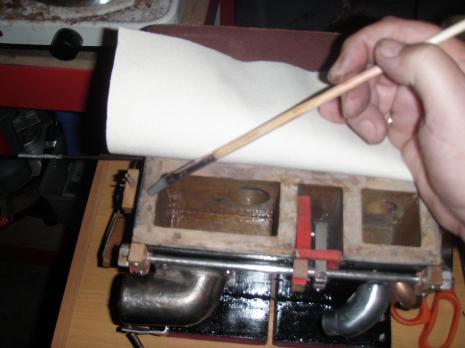
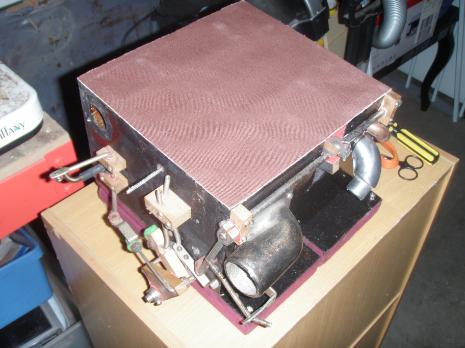
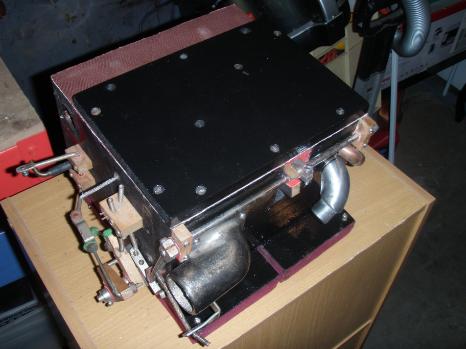
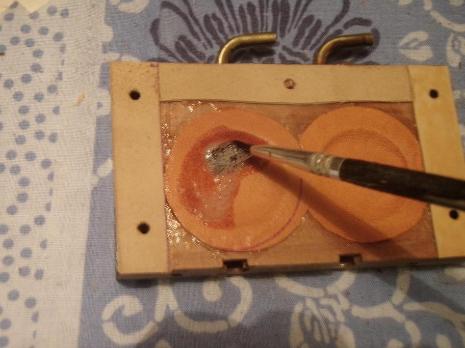
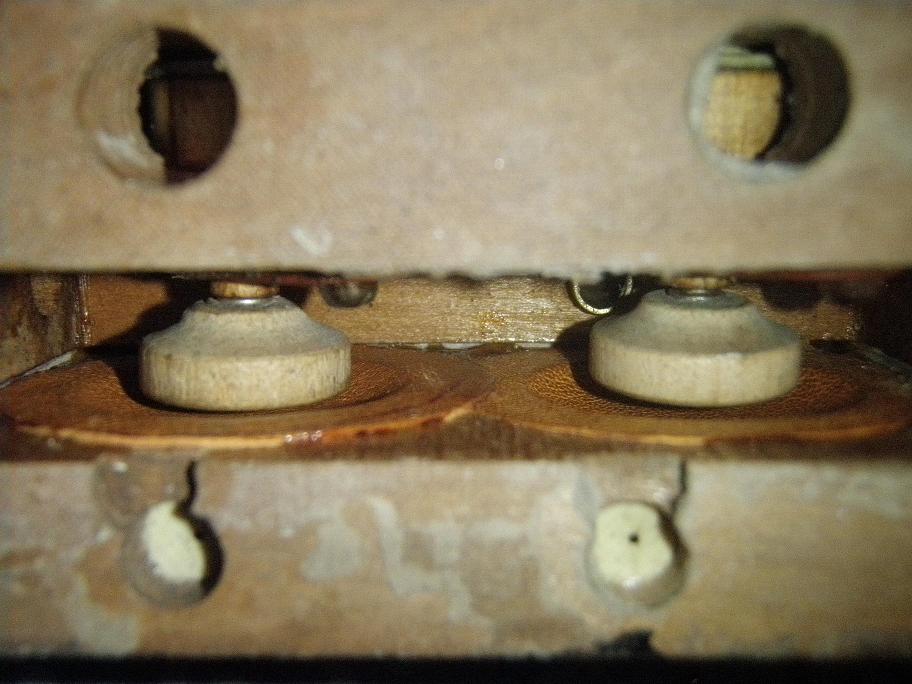
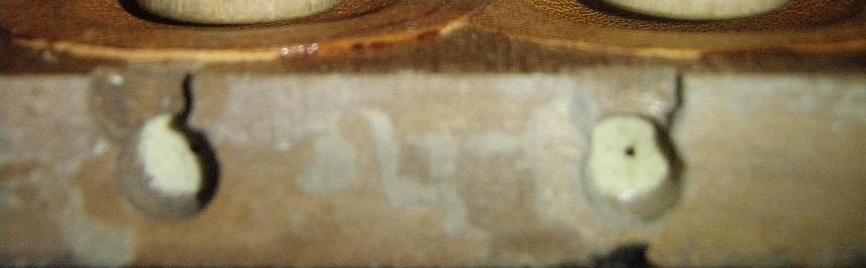
There are various methods to remove pneumatics (chisel, sharpened paint scraper, side force etc) but the conditions of storage of
the piano over the previous century will determine how well the wood separates: if dry conditions prevailed then it is usually
a simple matter for the hot hide glue to release, if more humid conditions existed, then the glue will still hold fast and will
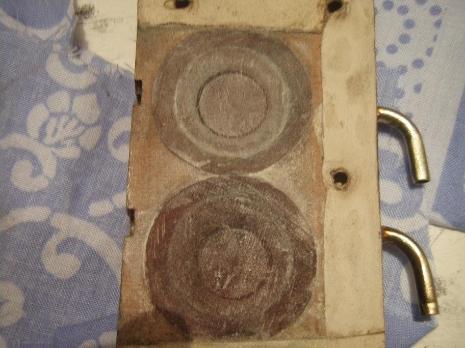
result in splintering of the wood before the glue gives way. In the case illustrated below, the later occurred. Rather than replace
the stationary boards on this motor they were each glued back together. At the time this may well have been an accepted method,
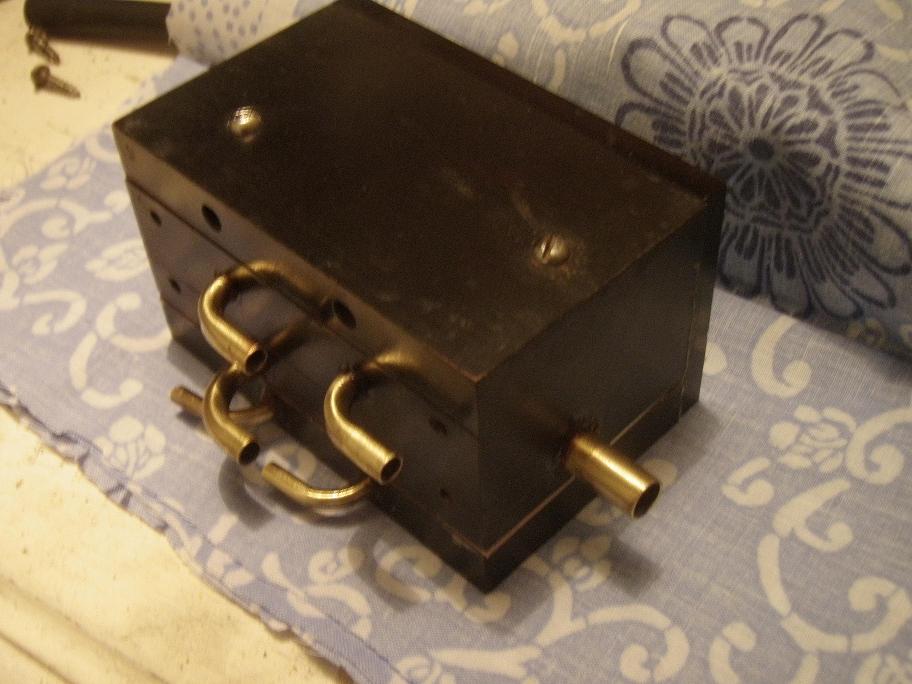
but today, we know that a myriad of air leaks can and will occur, resulting in an incorrectly operating motor. As the air motor
drives the roll across the tracker bar, a seamless rotation of its cam shaft is required. Even a nominal leak from one pneumatic
will affect the travel of the cam, in this case 25% per pneumatic, as there are 4.

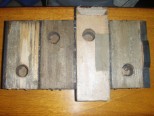
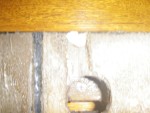
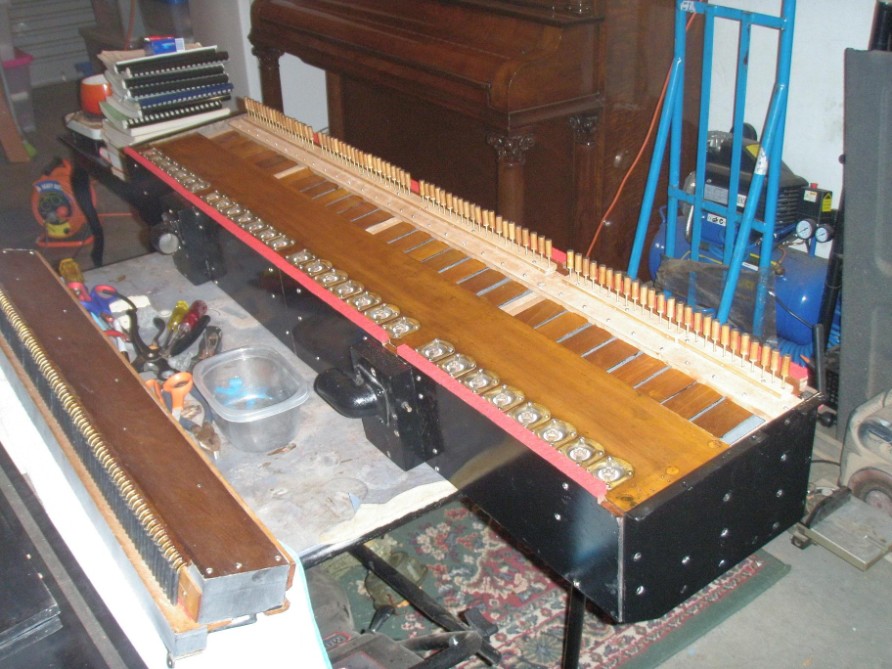
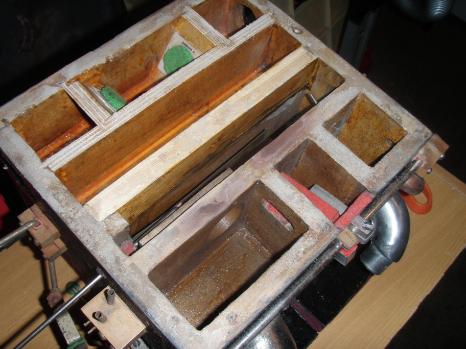
Therefore if wood splits, it is better to split the movable board rather than the stationary board, as the movable can easily
be replaced with antique timber and the main board sanded flat again.
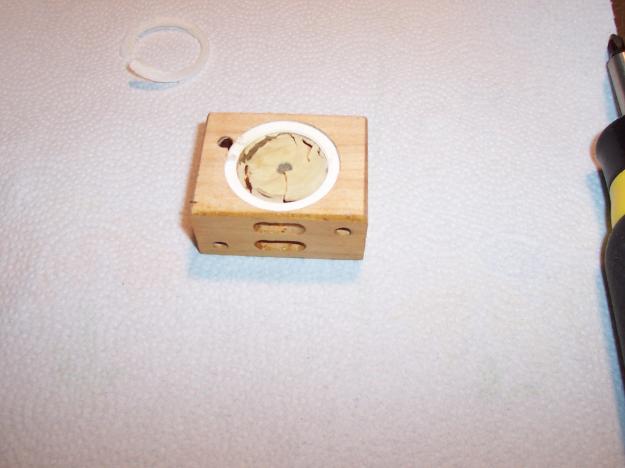
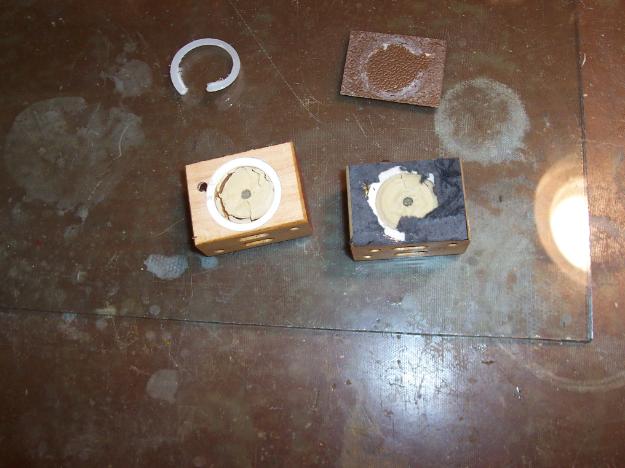
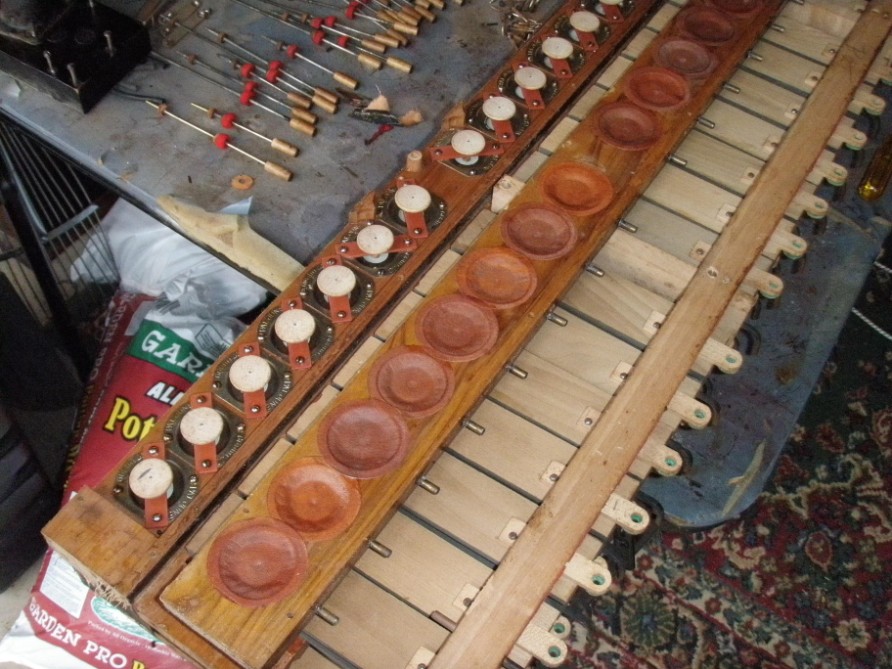
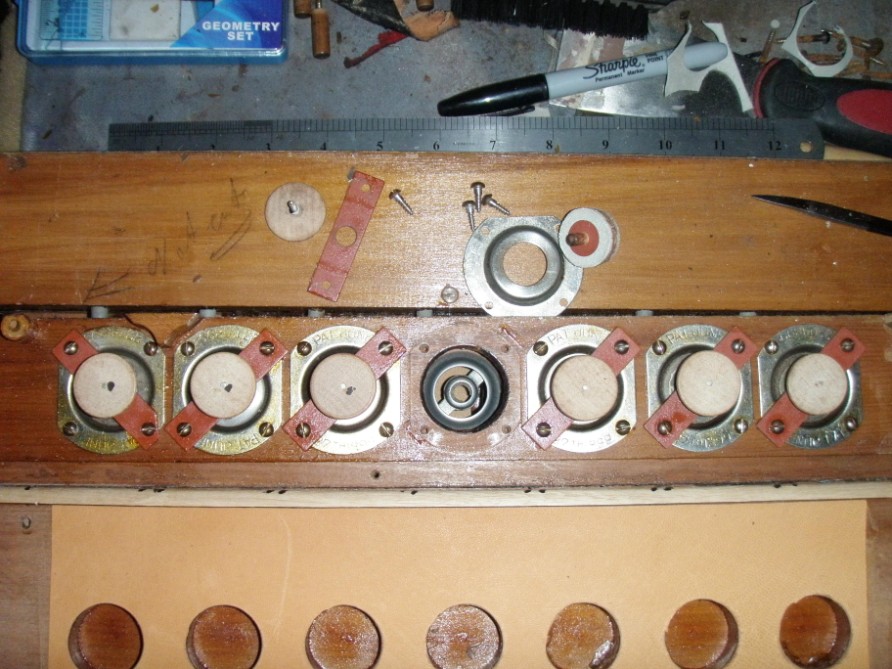
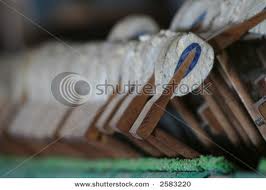
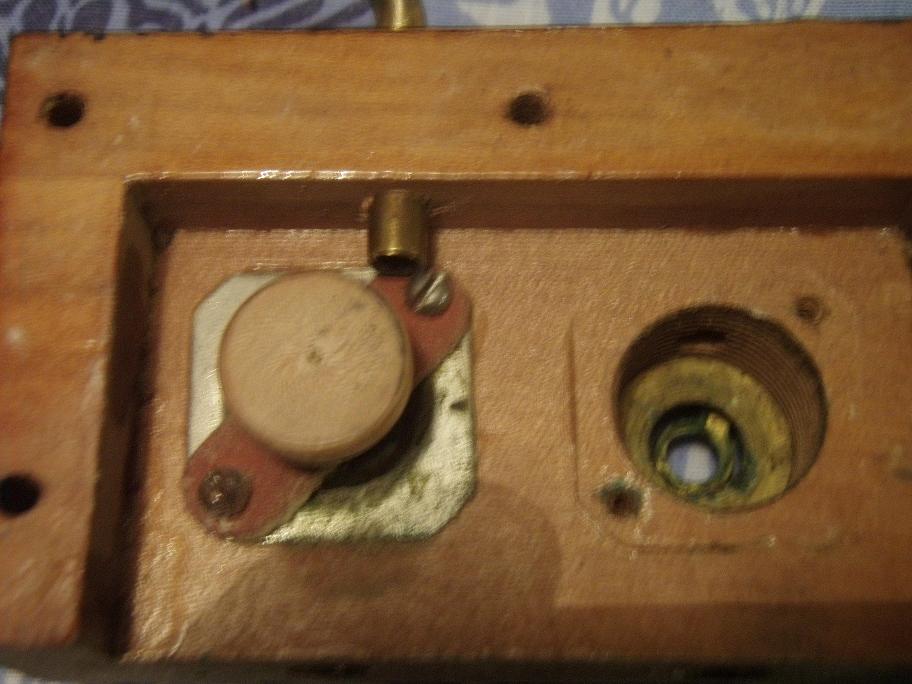
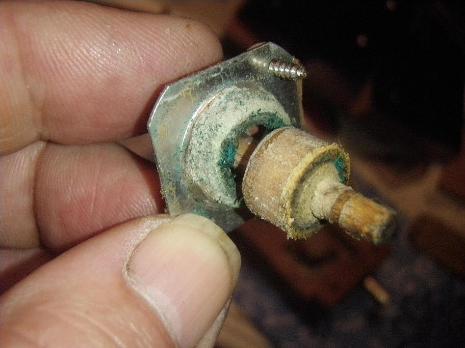
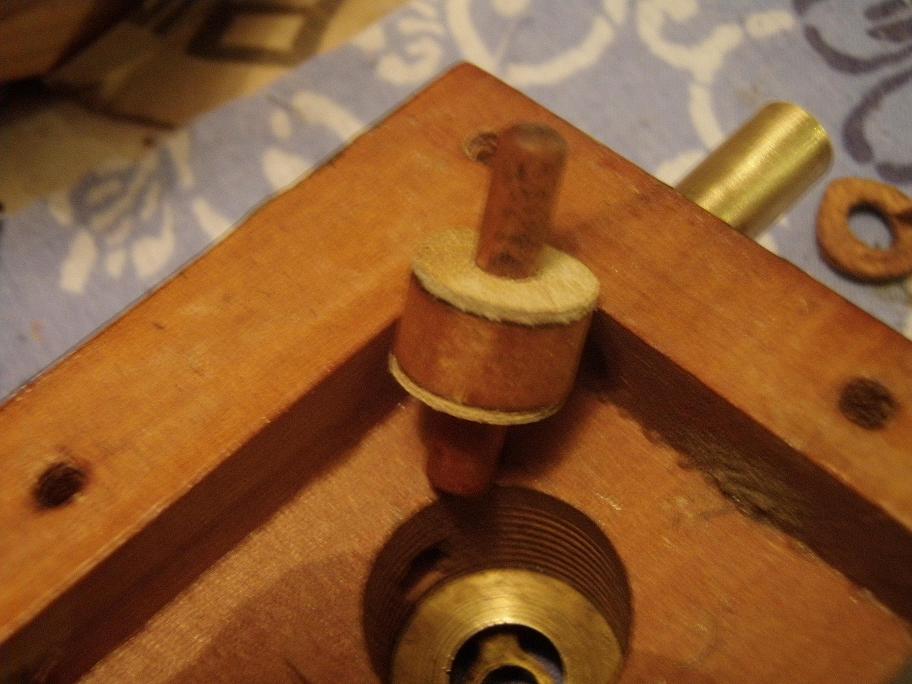
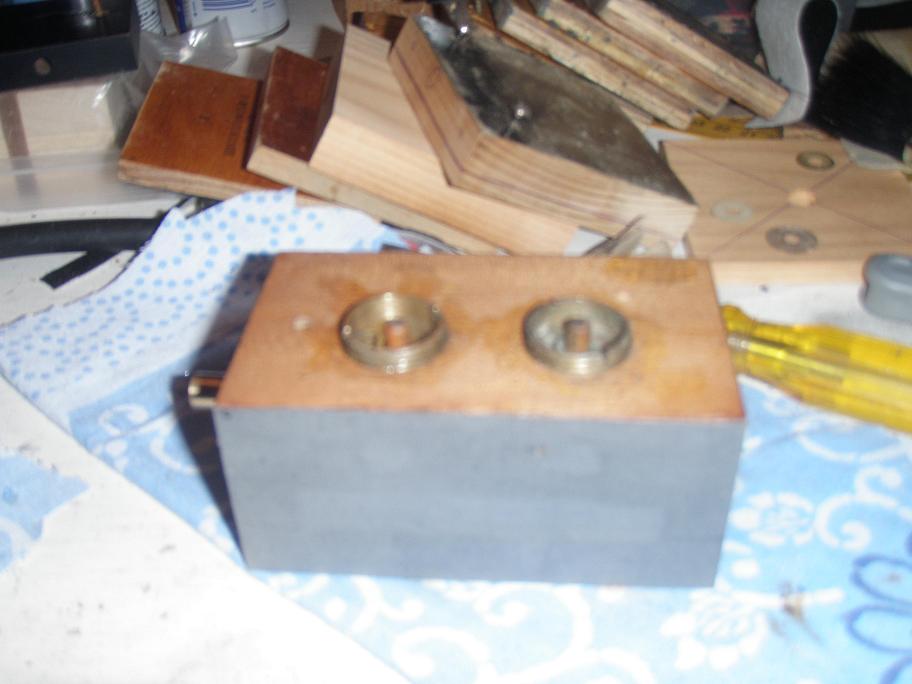
Valves

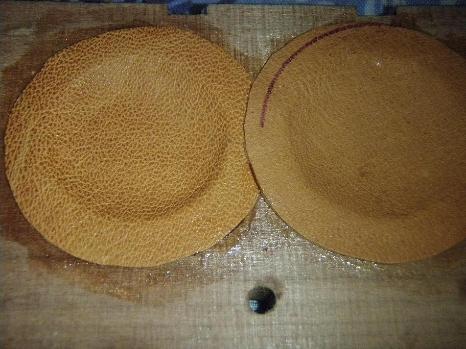
Possibly the most important component of the player action are the valves, also the most neglected component in amateur restoration. If you are going to the trouble of re-covering all pneumatics and replacing pouches , then it is crazy not to reface all the valves. This involves polishing metal seats, top and bottom, and re-leathering both faces of the valve. The selection of leather is vitally important, it must be valve leather and completely air-tight. Travel is also vital to the correct operation of the valve, the valve stem should have travel or movement of generally .040" . Another important adjustment is the valve clearance to the pouch, which should be 1/16".


My advice is to salvage all old wood from unrepairable players so that original period wood can be used to re-make these parts.
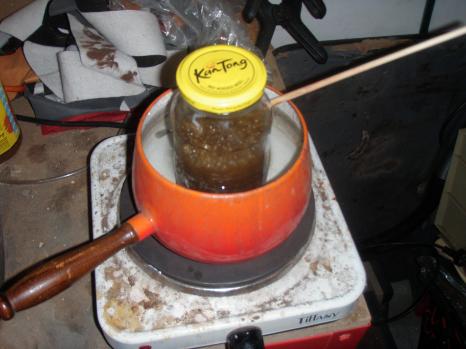
Use Hot hide glue only, as it allows easy future restoration and if sealing metal parts to wood: such as tubing, use burnt shellac
as it will adhere to wood and metal surfaces.

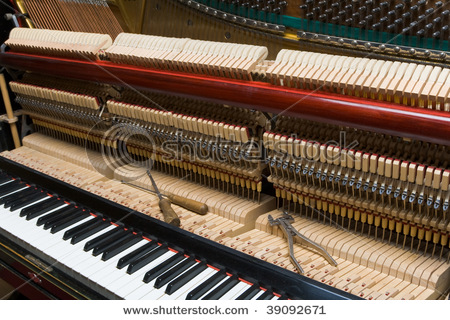
Even the finest player restorations can be ruined by a piano mechanism that is damaged or out of regulation. Of primary concern
is the piano itself, without a sound piano, no player restoration is viable.

The 10,000 odd moving parts of the piano mechanism must be perfect and the soundboard uncracked and correctly crowned. This allows the strings to vibrate the soundboard to the correct pitch.

Other concerns such as the case, are cosmetic, but do add to the overall flavour of the item and close attention to detail will
result in an antique of inestimable value in entertainment terms.

An average figure for a fine restoration is minimum A$5500.00 plus. There is usually a 2-3 year waiting list as restoration is
a time consuming process that can not and should not be rushed.

If you live in Australia, and wish to restore a piano or player piano yourself, but are having difficulties finding suitable materials, spare parts, even hot hide glue, look no further. This link will take you to Parke Piano Strings, a Sydney based distributor, whom I purchase all of my supplies from. There has never been a quality issue, prices are reasonable, fast deliveries and very easy and pleasant to do business with.

This website and its author have no affiliation with Parke Piano Strings.

 A list of approximate materials that can all be purchased readily from your nearest supplier:

  • approx: 2m x 2m of light cotton rubberized pneumatic cloth (for striker pneumatics)
  • approx: 1m x 2m of motor tosh (for large peripherals such as; air motor; tracker pneumatic; sustain pneumatic) 
  • approx: 2m x 3m of heavy bellows cloth (avoid fuzz backed) for exhausters and reservoirs on the pump
  • 1kg of hide glue
  • approx: 60-70m of 4mm tracker bar tubing
  • approx: 15-20m of control tubing
  • Flap valve leather approx: 1 square foot.
  • Valve leather: approx: 1 square foot, or pre-cut disks. 
  • Very approx: 1 x fine tan pneumatic pouch leather skin, or pre cut pouch disks to suit your player (for replacement pouches)
As most un-restored player pianos are 80 or more years old, all pouches, valves, cloths and leathers will require replacement. This is a certainty. It is wise to restore the piano action as well. First ensure that the piano is in restorable condition (a piano technician or tuner can gauge this for you). You may need to replace:

  • Hammers (of the correct weight)
  • Damper felts
  • Jack springs
  • Buckskin
  • Bridle Straps (a certainty, if un-restored)
  • Re-pining and replacement of all action cloth (it looks like felt, but isn't)
  • Hammer Rest cloth
  • New strings (old strings, particularly the coiled bass strings, go dead with age)
  • Possible new tuning pins.
  • Full piano action regulation
  • Finally; tuning (one of the most neglected requirements. A piano should be tuned approx 2 times per year) 
The list is intended as a guide only. If the plate is cracked or the wrest planks are loose, the piano is unlikely to be a viable prospect for restoration. Unless it is a particularly rare and valuable model. 
Plates are made of cast iron, not solid brass (as some are incorrectly advertised as) brass would quickly buckle under the extreme stress applied by the strings. Some were made of cast aluminium (aluminum) but the value of that material for piano plates is debatable.

 Case Restoration

Not absolutely necessary, but sometimes desirable.

There is no real requirement for full case restoration and indeed many will tell you that it will adversely affect the value of the piano. If the case is in reasonable condition, it is fine to leave it as is. If however the case is worn, scratched, blemished or otherwise unsightly, I believe that the case should be stripped back and re-finished. If done properly, it can only enhance the visual appeal of the piano, after all, it is on display in your home and after 100 years or so, restoration of the woodwork would seem to be almost routine. Avoid sandpaper where possible, careful scraping of the case with a wood scraper, will assist in not sanding through the relatively thin layer of veneer. These pianos are not solid wood, they are all veneered with sometimes quite rare and beautiful timbers. It is a wonderful feeling to restore these beautiful grains and patterns to their former glory. High gloss and satin finishes can be equally magnificent and it is a matter of individual taste as to which finish to choose.

There are many web sites devoted to timber types and they will assist you to identify the species of wood that your piano is veneered with. Use this information to choose the matching wood-stain. It is desirable to stain the wood with its intended tint rather than use a Mahogany stain on a Walnut veneer, as an example.

De-laminating and peeling veneer must be firmly glued back into place and allowed to dry prior to any casework being undertaken. Care must be taken with fragile veneers, as it can be impossible to source replacement veneer of an extinct or rare species.

 This You Tube  video  gives a great insight into a great player piano restorer.

Damage like this can easily occur. It is better to replace the splintered board than to attempt the type of repair shown. 


 Restoration of the stack is a big task and you only want to pull it apart for restoration once. If methodical routines are employed and the correct materials used with a fair slice of patience, a decent restoration is within the grasp of most anyone. During stack restore, each striker pneumatic must be carefully removed from its board and recovered with light pneumatic cloth. Each component must be numbered so that they may be replaced exactly as they were (there can be no cheating whatsoever). Every valve must be re-leathered and every valve seat top and bottom must be cleaned and polished. Every valve must be returned to its exact position on re-assembly. All metal rods  and screws etc, should be polished and re-plated if desired.  Any component that employs action cloth should be cleaned of the old cloth and the same guage cloth replaced, do not use felt, felt is NOT action cloth and will quickly wear out.

Remember: Cloth to wood =Hot hide glue

                  Leather to wood = Hot hide glue

                       Wood to wood = Hot hide glue

                      Metal to wood = Burnt shellac

Lubrication : wood against wood or cloth = Dry Graphite powder mixed with a little metholated spirit  as a carrier and rubbed into the wood. Metal to metal as in the transmission = Sparingly apply light machine oil shafts and chains.

Burnt shellac is made by lighting (carefully and outdoors) in a suitable heat resistant container, a small quantity of made up shellac, until most of the spirits have burnt off. When cool, it becomes a thick liquid that may be stored in a closed bottle indefinately. The only sealant to use on metal to wood.

Keep a fire extinguisher at hand. Use safety glasses and heat resistant gloves. Do not come into contact with burning or hot liquid.          BE CAREFUL.

                      White wood glue can be used on components that are never meant to come apart, eg: frame, split wood etc.

When re-covering all pneumatics, hot iron the glued area after attaching the cloth, this will heat and draw the hide glue into the fabric for a longer lasting and stronger bond.

I have gotten immense value out of the occasional purchase of an un-restorable player. Screws, linkages, springs, wood and other bits and pieces that can no longer be easily found. They simply dont make screws like they used too.  I usually pay no more than a dollar for an old junker. Storage can become an issue though, at a guess maybe two hundred dollars worth of spares from each one.

Refer to Arthur Reblitz  Book Player Piano Servicing and Rebuilding for comprehensive instructions in the art of player piano rebuilding.

Never try to take shortcuts when gluing any pneumatic component. It will not work for any reasonable length of time and may make future restoration difficult, if not impossible. Use hot hide glue. Never try to 'patch-up' with silicone, it absolutely will not work, and just as absolutely, will render the component, irrecoverable.  Of particular concern when used on  complex components that can not easily be re-made. The use of correct materials is a recurring theme through-out this website, and it cannot be said too many times. 

When restoring, if you must re-make a component, copy it to the maximum degree possible, in order to maintain the 'originality' and therefore the historic value of the machine. Some museums and collectors maintain the worn-out state of their player pianos and will not repair or restore them, in order, they say, to keep the integrity or 'originality' of the piano. I believe that non-restoration preserves nothing other than a boring non-working machine, somewhat akin to a large and extremely heavy paper weight, and about as useful.  

 Its all in the details

Once the case is restored, pay particular attention to all brass and nickel fixtures. Polish them and seal them with metal seal. They will look great and the sealant will stop further tarnishing. No detail is too small, even the hinges look great and add to the overall appeal of the piano. 

Be careful with plated fixtures, polishing through the plating is OK only if you are having the component re-plated. Some components, such as transposing dials on certain Duo-Art models, are blued. You can not successfully polish a blued component without damaging the treatment. Carefully consider polishing such items, unless you intend to re-blue them.

When applying light machine oil to chains and sprockets in the transmission, don't go overboard, a drop is literally all that will be necessary to keep the metal parts lubricated. It is advisable to clean off and re-apply lubricant occasionally. Don't allow the lubricant to build up to a black sludge. Whenever I service a transmission for the first time, I usually remove the assembly and soak it in mineral turpentine (wooden parts stripped first) for an hour or so, then clean it with a toothbrush or equivalent, to remove years of grime.  An alternative to machine oil is a light smear of  Vasoline (TM) Petroleum jelly.  Ensure that no lubricants are used on spool brakes or any other tensioning devices. 

When things go wrong...

I thought it of some value to you the reader, to see an example of  a failed (in the player field) modern material, Polyurethane. While fine for other tasks, the product literally disintegrates when exposed to the stress of work in a player piano. These two photos demonstrate why I continually stress the use of traditional materials when restoring your piano and player.

Courtesy of my good friend Michael:


In fairness, who could have predicted that this deterioration would occur, the product was sold years ago in good faith, and used in good faith. It proves to me anyway, that the old timers knew a thing or two about material requirements, stresses and longevity. These pouches are 35 years old, you can still find 90 year old leather pouches in operating condition. 

 There is no such a thing as a ‘typical’ restoration when it comes to player pianos. Different climates, storage 
and insect infestation determine the levels of repair/reconstruction required to obtain a quality working device. 
Unfortunately the maximum spend should be reserved for rare or unique players, such as expression or reproducing 
players. A high quality rebuild that basically gives you a machine brought back to the condition of the showroom, can cost between 
   US$5000 and US $25,000. Once again, many factors including the demands and expectations of the owner, determine the end cost of restoration.


Most rebuilds involve re-tubing and recovering of pneumatics at the very least. The more expensive and high quality 
restorations are as detailed as re-crowning the sound board and re-plating with nickel most metal items right down 
to screws (if seen). If correctly conducted, a restoration can last up to 80 years.

When restoring family heirlooms, the amount of money spent is subjective to the sentimental value of the item 
and has no monetary significance.

Only the traditional materials and techniques must be used to restore, any deviation from this rule will destroy the 
intrinsic value of an irreplaceable antique. This means; only hot hide glue for wood and leather, and only burnt shellac 
as a sealant for metal to wood. Shellac as a wood sealant, and traditional refinishing of the casework in French polishing 
if the restore extends that far. 

These tried and true methods have withstood the test of time and have allowed many of these mechanical marvels to make it 
through two centuries, many still in working order with no repair as yet (sorely needed though repair may be). 

To quote Art Reblitz, an eminent expert on mechanical music devices: 
"There is nothing quite as beautiful as a restored player that looks and performs the way it did when first delivered from the showroom" 

  Always sign your work. It is an indelible record that will last for decades

A great tradesman is one who does not fear to put his name to his work.

 I use a rubber stamp with my name, date and location of repair, but a simple signature will do nicely, a date helps too.

Stradivarius

Sign under lids where there is bare wood on player actions and mechanisms, at the back or side of piano actions.

Re-tubing the tracker bar 

Probably the most daunting project for the beginner,  re-tubing the tracker bar to the stack is actually one of the more simple procedures in player repair. Every tracker bar has a sequence of three diagonal nipples running the full length of the bar.  A standard tracker bar will have one large nipple at far left, that is the automatic sustain. Some are tubed for pneumatic control of the tracker, or centering, device with two offset nipples on either side of the 88 notes, notably, Standard and Autopiano. If there are 88 pneumatics in the stack, then the re-tubing will flow left to right a full 88 notes. If however, there are less pneumatics in the stack, say 82, then you will start the re-tubing at no:4 nipple so that an equal number of unused nipples will be left on the other end of the bar. This is the same procedure allowing for any different number of pneumatics. Not all 88 note player pianos have a full compliment of 88 pneumatics in the stack.

If the tracker bar is transposing (will slide left or right to alter the scale) a little more length of  tubing is required to accommodate this feature.

Be careful when removing the remnants of old tubing so as not to overly bend or distort  the nipples. it is usually best to push the rubber off  from the base of the nipple with a flat implement, avoid pulling the old rubber off as this can seriously damage the nipples.

It is a very simple system, nothing to be afraid of, as all tubing will readily be returned to its correct position very easily. When replacing, use highly flexible black rubber or neoprene tubing 4mm. Most units will use approximately 10 to 15 metres, (20 to 30 feet).

Remove the rear cover and top cover over the rear of the tracker bar, to allow  easy access for re-tubing. Once the bar is fully re-tubed, with gentle but firm pressure, push the mass of tubes down so that they are densely packed under the cover. 

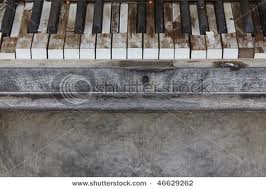
Tracker Bar Maintenance 

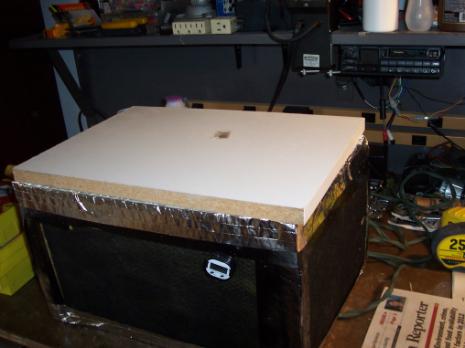
It is of primary importance to keep the tracker bar in perfect order.  As the inlets on the bar are the conduit of dust and paper debris into the player action, it is imperative that the bar be cleaned out on a regular basis. I recommend a tracker bar pump, they are available new or second hand. These small hand held suction pumps are designed to fit the tracker bar snugly, and by simply pulling the handle, will exert sharp suction momentarily to the inlet holes of all pneumatics and peripheral devices. It contains a small screen to catch any dust and paper expelled from the system, and is a valuable tool for ensuring longer trouble free player operation.


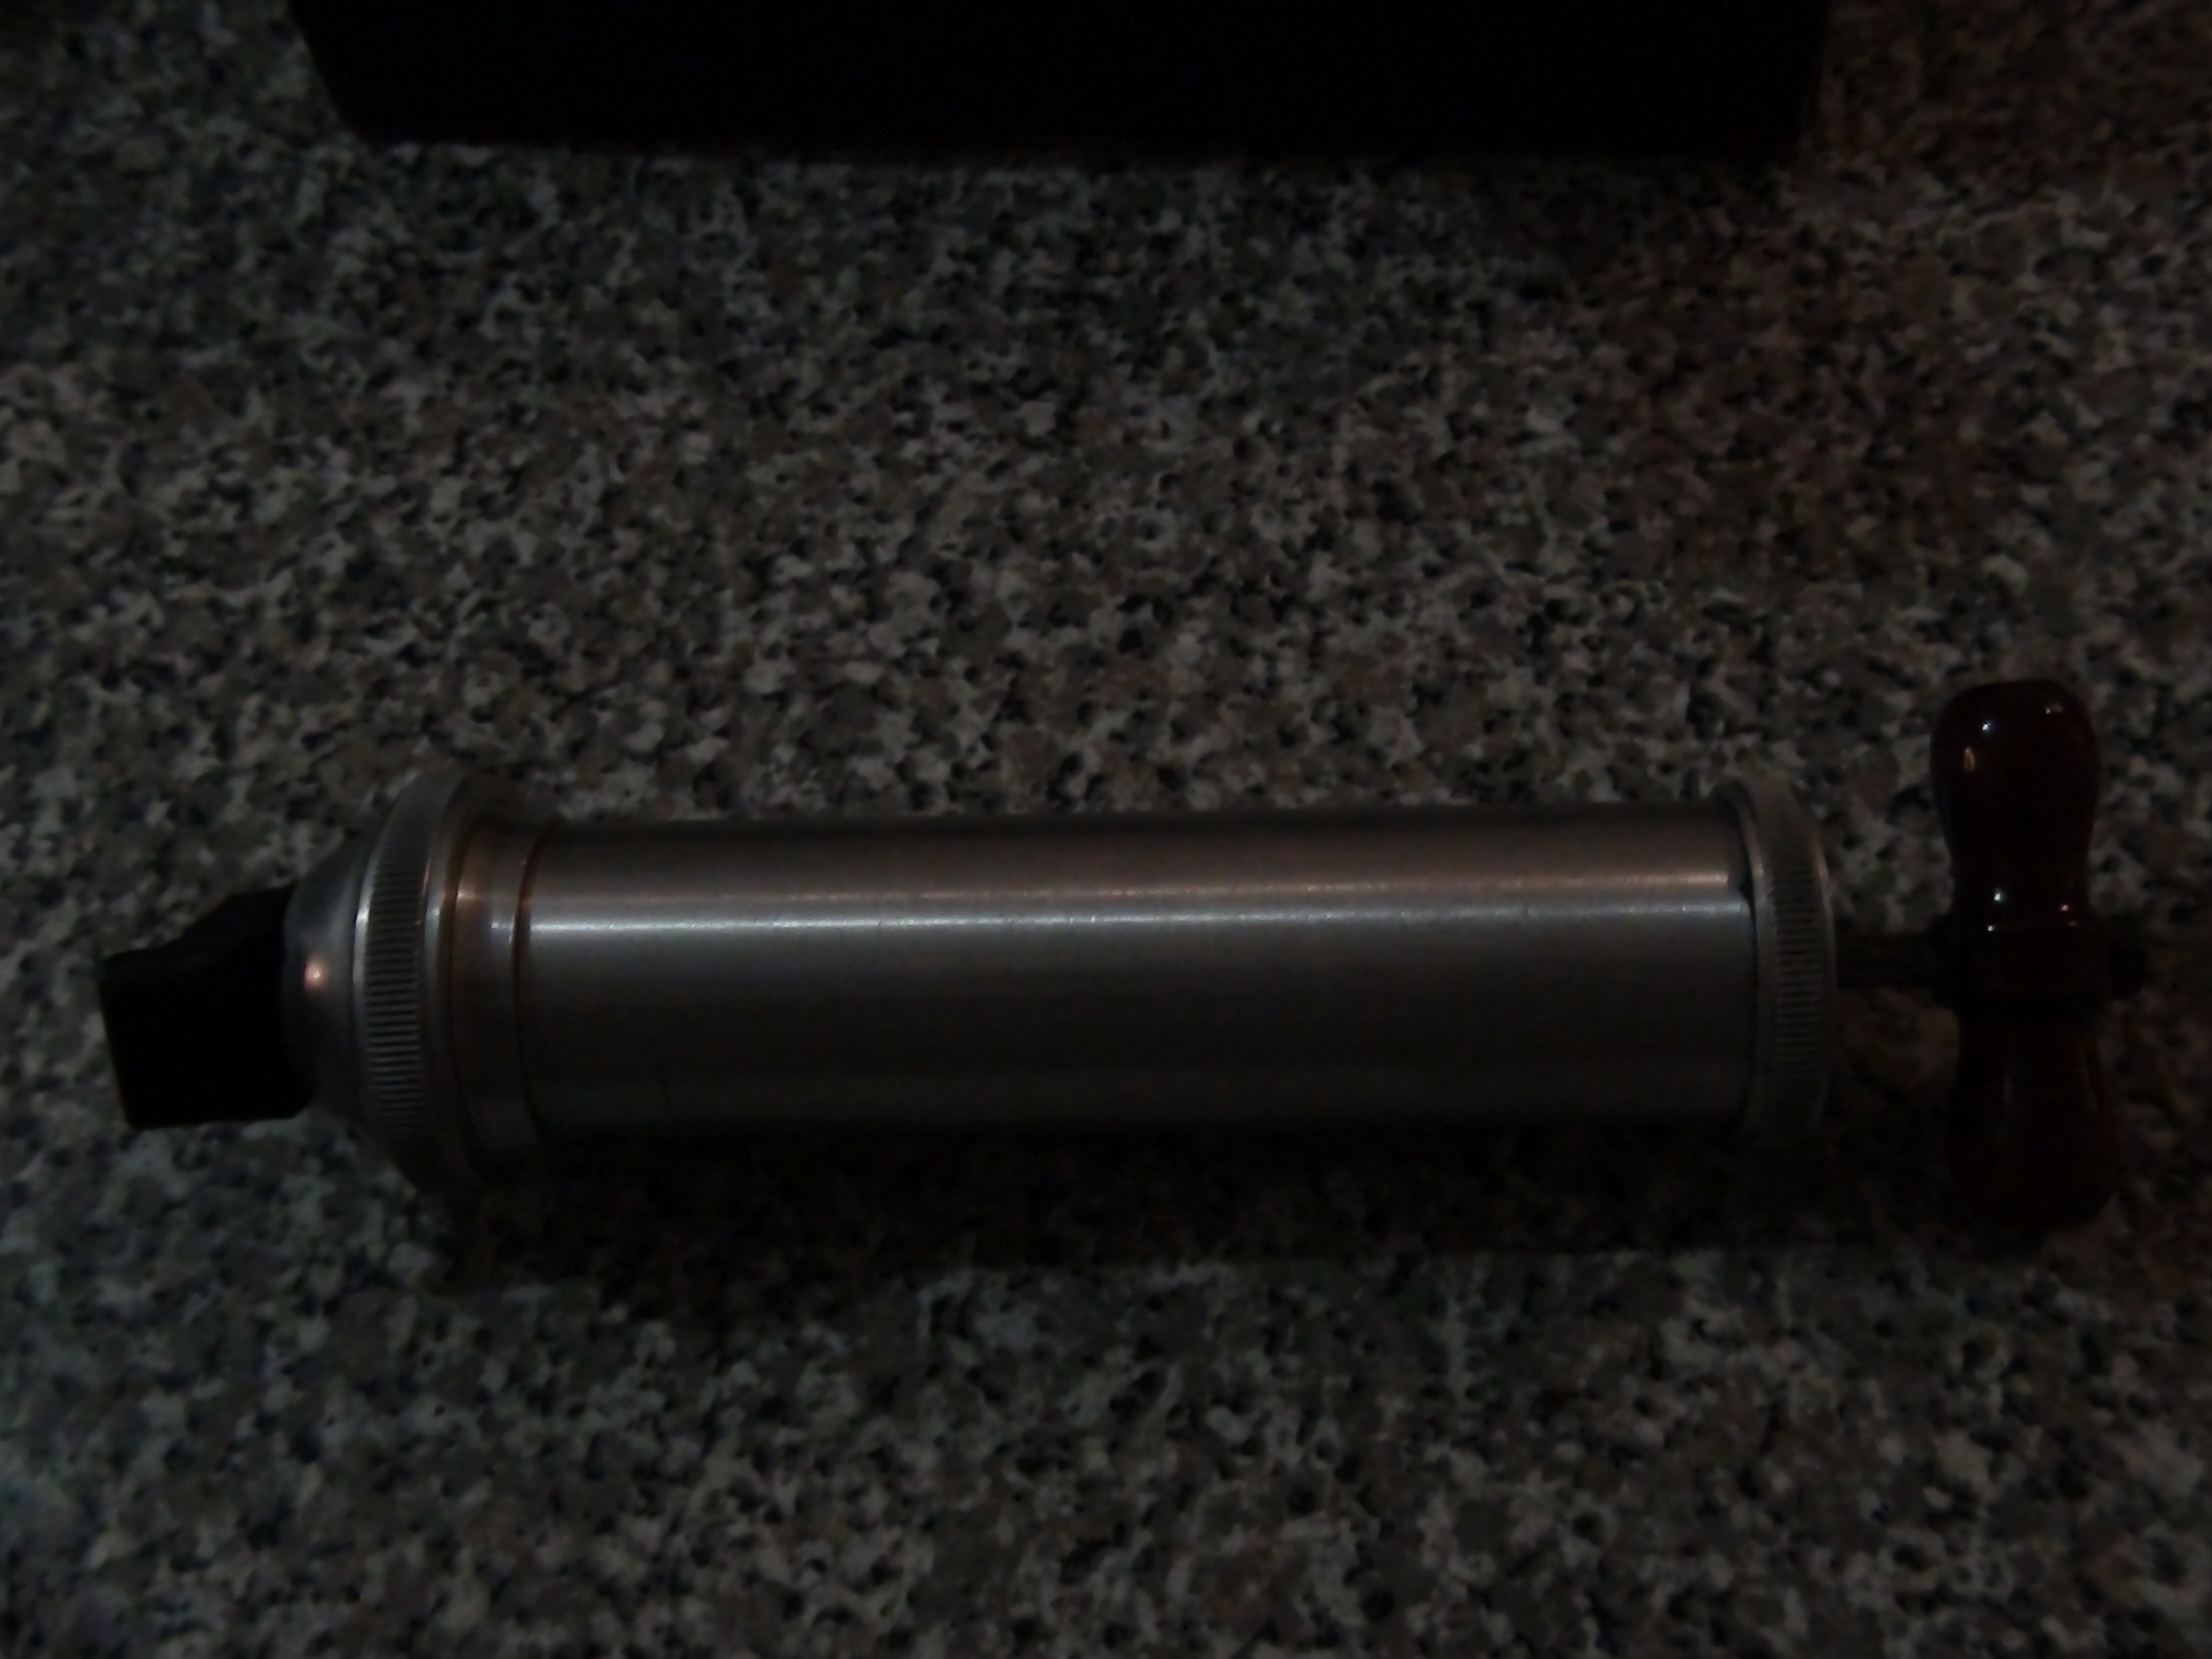
The Tracker Pump pictured, has a moulded rubber connector, for a firm non-damaging fit, contoured to your tracker bar.

Keeping the tracker bar polished 

The easiest tracker bar maintenance, and the task most often neglected, is keeping the bar in a clean and highly polished state. By keeping the bar highly polished and clean, your rolls will glide over the surface without impedance from dirt or oxidation of the brass or nickel plated  tracker bar [no drag]. In addition, it is one of the first components  looked at by admirers, and should always be in a presentable condition.

Of course, when polishing with light metal polish Silvo (TM) or Brasso (TM), care must be taken with nickel plated bars, as the plating will be quite thin. 


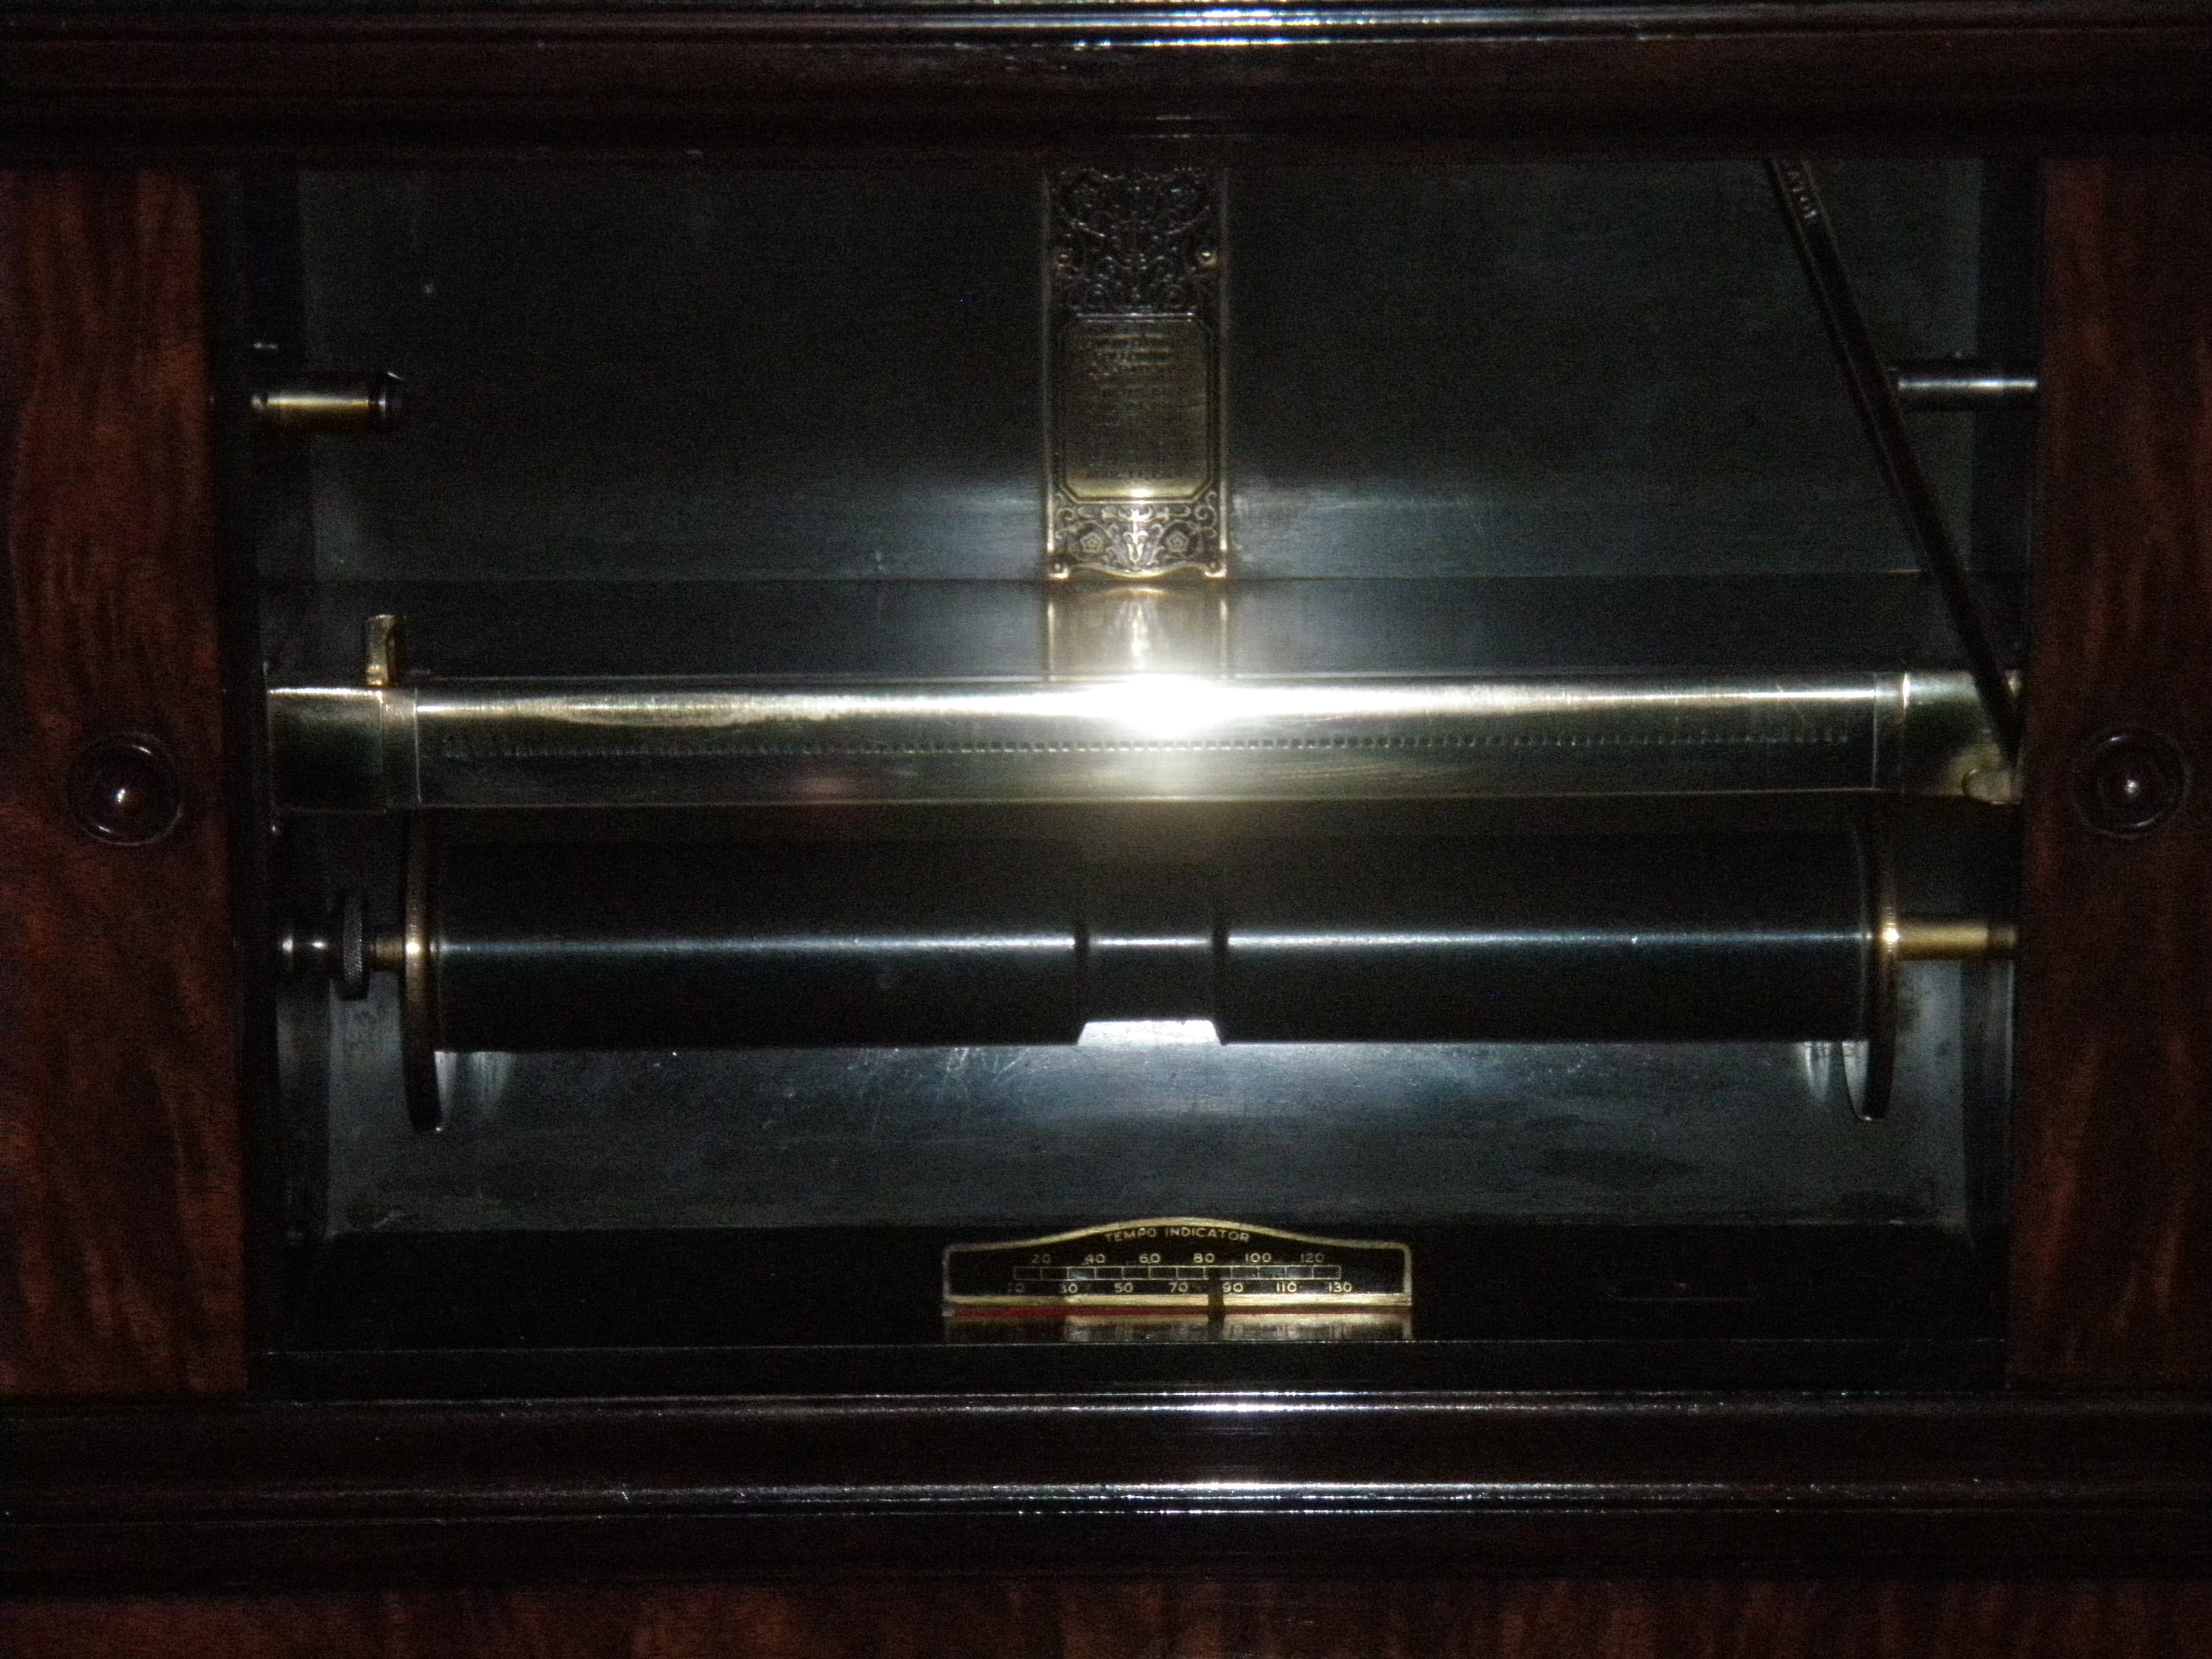
The beauty and easy operating of your player depends upon these minor details.

A word or two about screws 

Only use wood screws for wooden components. Slot head only (no Philips head, it looks wrong) Dome head slot screws for flat wood, flat slot recess wood screws for recessed screw holes. Use the right diameter and length of screw to suit the task, don't force too large a thread into the wood, it will splinter.  Salvage as many antique screws as practical for use in player work, they no longer make the quality that antique screws possess. For some reason the slots on new slot head wood screws are not cut deep enough for the proper screwdriver.

 Never fill a threaded hole with toothpicks, putty or equivalent, the packing will pull out eventually. If necessary and when possible, drill a perpendicular hole and glue an appropriately sized wooden dowel where the thread of the screw will be, this will give the screw new wood to lock on to, and reduces the risk of the screw pulling out. Don't drill directly into a threaded hole when dowelling a threaded screw hole, the new dowel will almost certainly pull out over time.  

Save all antique screws, if you come across a junk player, remove it's screws and keep them. I have been saved many times by having the right period screw available on hand.

 The Value of Home  Purpose Built Tooling

In this age of technologically advanced electric tooling, far removed from the hands -on manual tools of the player era, many tools for player re-building must be made by the restorer, in order to  produce better results and lessen the effort involved (as much as possible). To illustrate the kind of ingenuities performed, the following photos are of items made by Mike, a restorer in Indiana USA:

These are of a heat box I made to heat the wood pieces up some to slow glue setup. I think it will help with gluing pouches and covering pneumatics.

My old iron sitting upside down on a small wooden base to support it

An old upside down baking pan setting on the iron and a few layers of paper towels on the pan.


A box made of some old foil faced insulation I had, with a thermometer poked thru its side. 

Just a scrap piece of wood to cover it. Likely just cardboard folded up would have worked for the entire box too.


 With the iron setting on one of its lowest settings the temperature in the box stabilized at 101 degrees F relatively quickly.

 Photos taken during restoration of a Weber Grand Aeolian Stack:

Steps to re-cover striker pneumatics 

Hinge diagram.ddd Hinge diagram.ddd
Size : 1.017 Kb
Type : ddd
Pneumatic recover1.ddd Pneumatic recover1.ddd
Size : 0.598 Kb
Type : ddd
Pneumatic recover2.ddd Pneumatic recover2.ddd
Size : 0.827 Kb
Type : ddd

 Storing your player and correct placement in the home

Too many players, pianos and other mechanical musical instruments are positioned badly  for long term storage. The garden shed and garage is definately not the place you want your instrument to live.  They can and will deteriorate at speed in these environments. They are more prone to insect and rodent infestation as these nasties have a feast on all the leather, felt and wood. But they will also be affected badly by extremes of humidity, heat and cold. As an extreme example: I was invited to pick-up a Beale player that was stored in an outside garage after it's owners death some five years earlier. The roof leaked, naturally right on top of the piano. What was left of this fine instrument was an exploded mass of wood, piano and player actions that seemingly had melted down through the instrument to end up a pile of rotting wood and rusting parts in the base of the piano that could hardly be identified. The soundboard was mush and the wrest planks had long since parted company with the frame. This along with about one hundred moulding rolls was a tragedy in motion.

Correct storage means sitting the machine away from frequently open windows, and backed up to an inside wall. If the instrument is rare and valuable, eg: A Steinway Grand Duo-art or an Ampico, it is wise to keep these instruments in a climatically controlled environment. Devices are available for humidifying and de-humidifying the piano, should you live in an extreme environment.


Tuning and Regulation 


Tune the piano at least twice a year, this was and is advised by all piano manufacturers. Pianos seasonally go out of tune. Hard playing can cause the piano to lose tune. The longer a piano is left untuned the more difficult and extended is the process to pull it back and a series of tunings will be required to restore A440 pitch. A routine of regulation of the actions is important, as components wear, they require adjustment for the device to continue to play to specification, until it becomes time to replace felts, leathers, hammers etc. It is important that the player action mates properly to the piano action, there are many adjustment points, letoff regulating screws and buttons  that connect the player action to the piano action. Over a period of use, a loss of motion will occur, this needs to be adjusted as components wear. Dont forget, there are around 10,000 moving parts , each part is important and each part needs your attention, from time to time.

Piano Caster Wheels, Trolleys & Dolleys 

One of the most neglected parts on the piano are its wheels. Piano casters were never meant for roads or driveways. They are only intended to be used to move the piano a minimum distance over a smooth surface. If you are hauling a piano over greater distances, use a piano trolley. It will save damage to the piano, the floor and your back. 


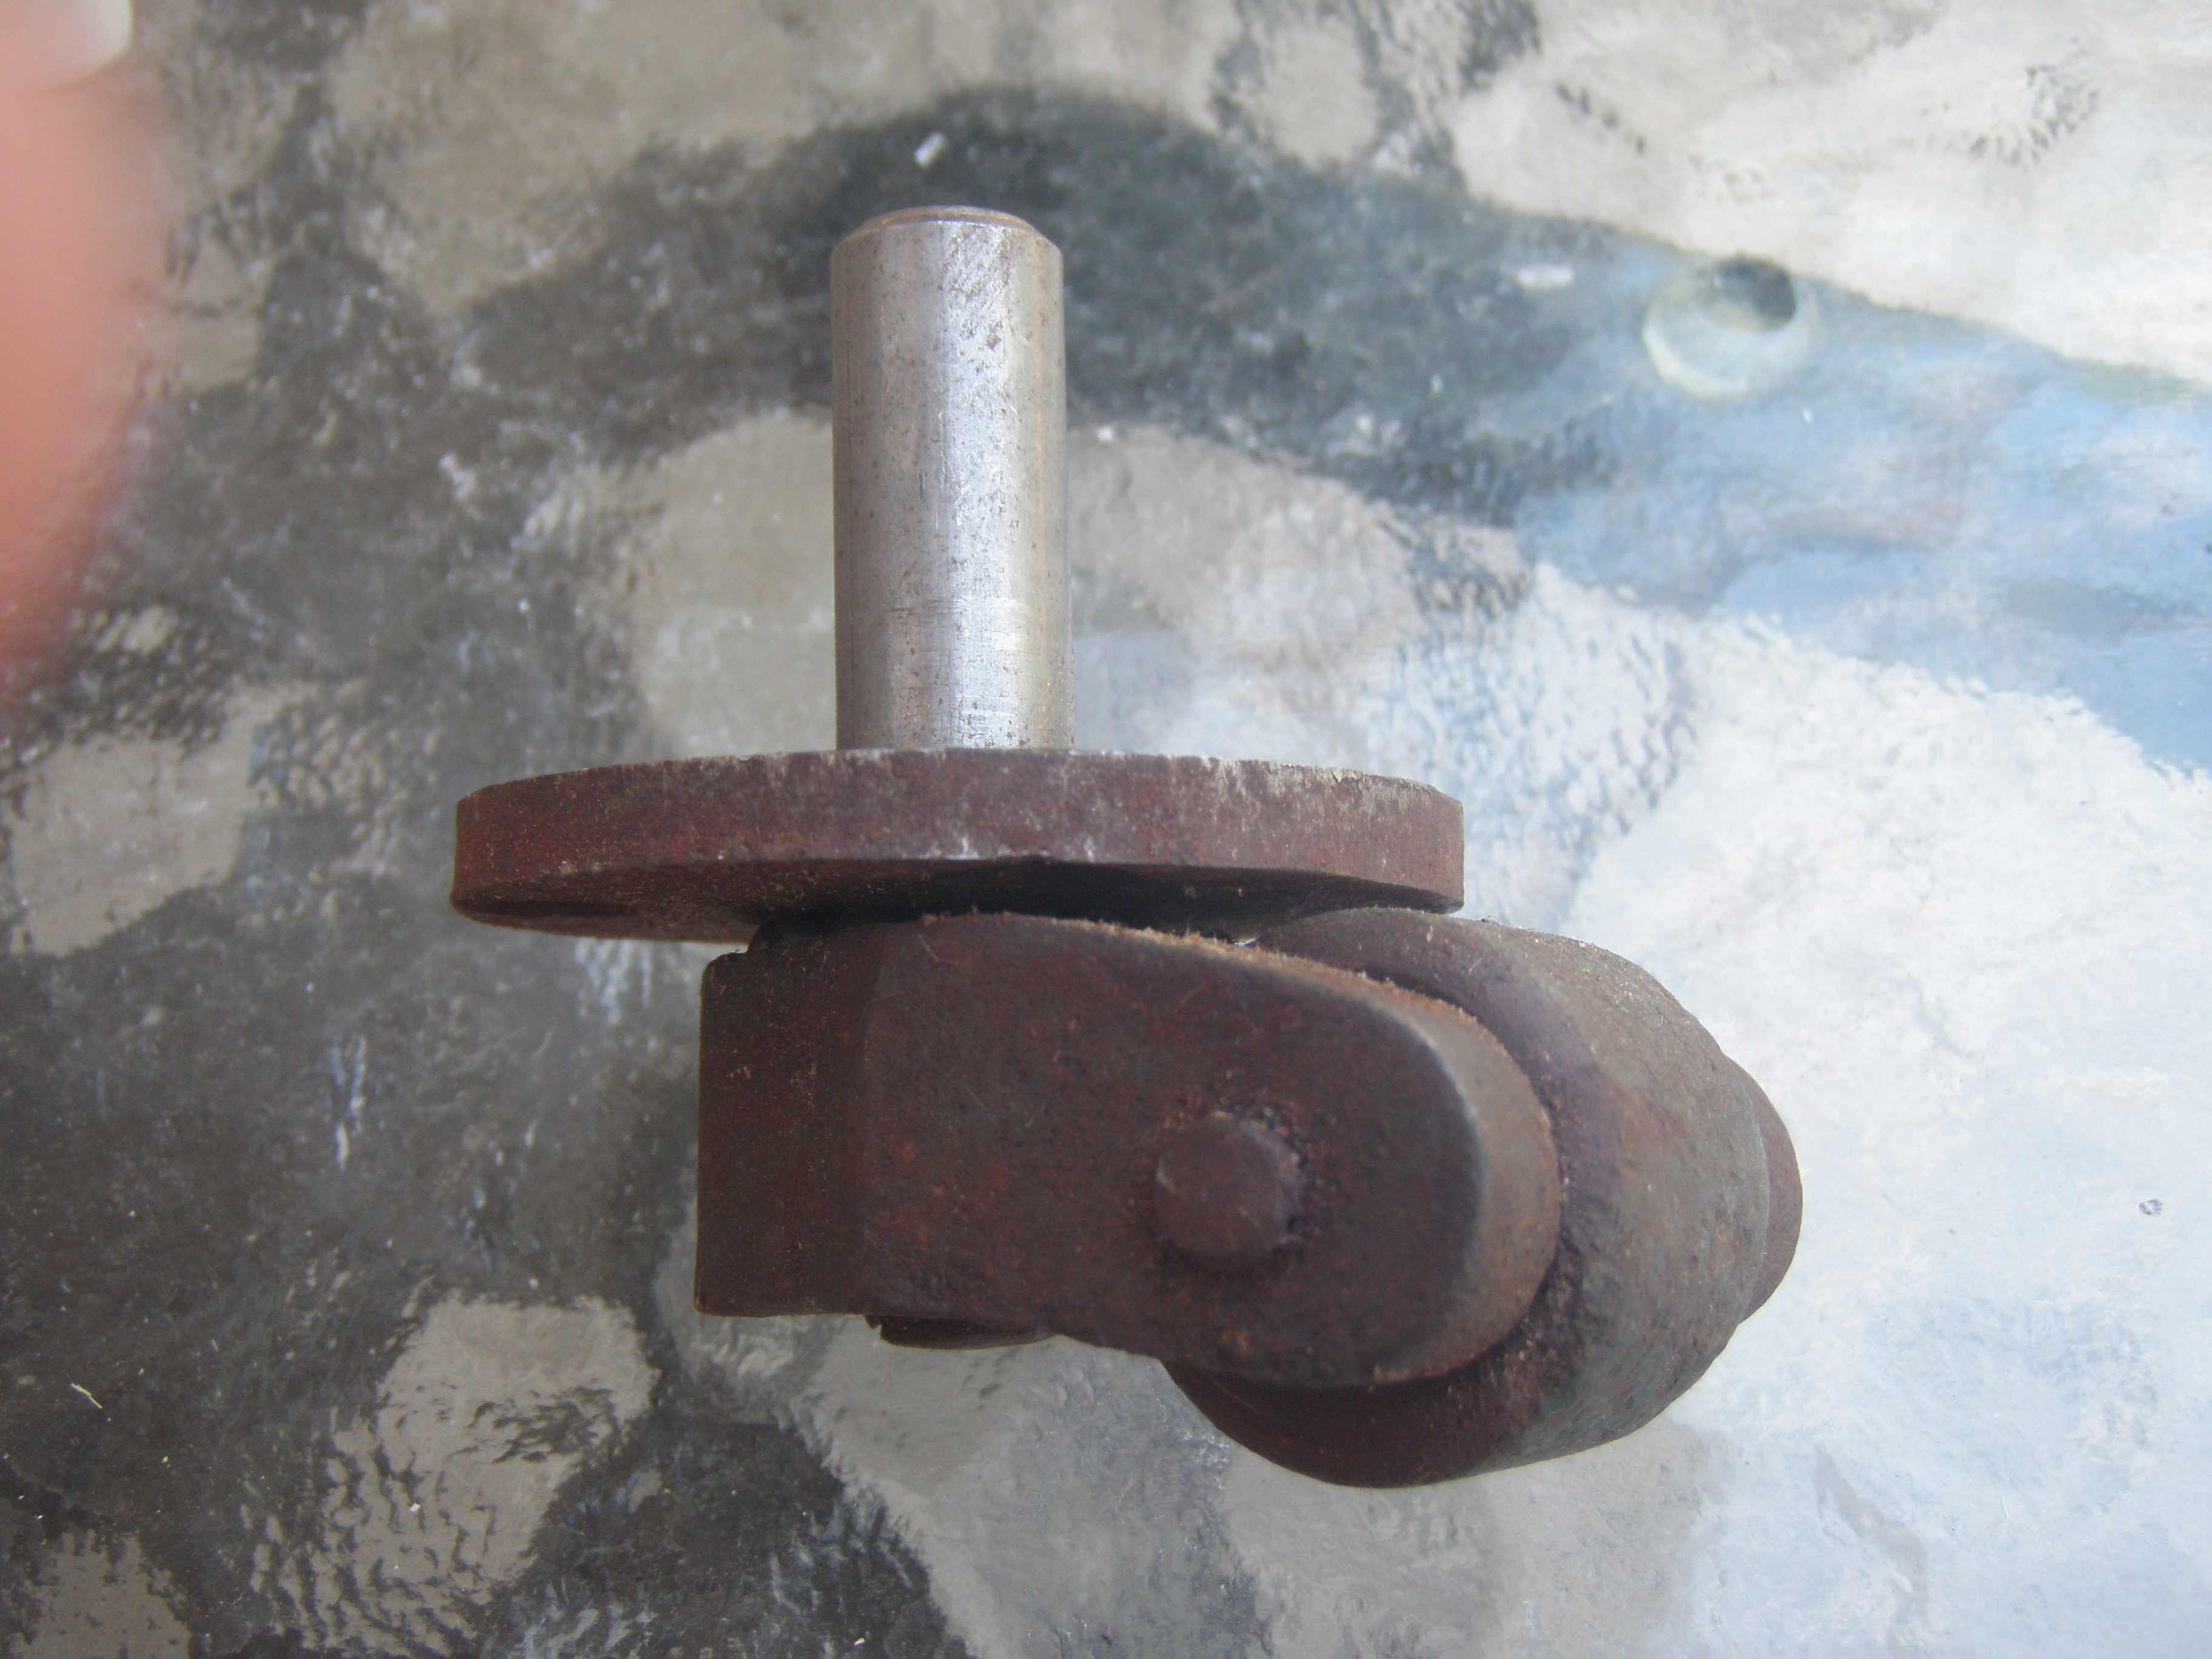
Every old piano I have ever encountered has some problem or other with its casters,  either they are bent, stuck in one direction, missing or haven't been greased for 80 years (a condition which causes them to seize up and ultimately lose their bearings).  Never allow the casters to sit in water. Always secure the piano to the trolley.  Never attempt to traverse a ramp or slope with piano on trolley, on your own.  I know this is basic stuff, but nobody wants a 600Kg piano as a blanket.


Grease, repair or replace the casters when you have the piano safely braked and secured to a piano dolly.

 These piano dollys are readily available to hire.    


Using Hot Hide Glue 

 The only glue to use on wood, cloth, felt and leather in a player, is hot hide glue.  The glue comes in bead form. It should be soaked in clean water for at least 24 hours prior to use. Using a glue pot or a home-made arrangement, such as mine (pictured) the glue is heated for use. Temperature for the glue to remain usable is 145-150F/ 62- 66C.  The subject is a Duo-Art Expression Control Device.

My simple yet effective glue pot, is a glass jar in a pot of water, on a small portable adjustable hot plate. You can buy a purpose made glue-pot, but this style works equally well. 

I use a warm iron to heat the wood (without scorching) prior to gluing. It allows the glue to remain tacky for longer, and assists in strengthening the bond. 

Ensure that any voids in the wood are filled, dry and sanded, prior to glue application. 

When gluing cloth to wood, as above, glue section by section. Trying to cover too large an area, with a large or complex pneumatic, will allow the glue to set too fast. As you go, peel back and reapply glue to any voids that appear (on the cloth) to ensure a uniform bond. 

Gently iron the newly glued cloth with a very warm iron. This will assist the glue to bond more tightly to the wood as the heat will liquefy the glue allowing better penetration into the cloth backing.

I prefer to use a blade to trim the excess cloth.  Particularly with heavy bellows cloth.

 Sharp scissors may also be used. Scissors are indispensable when gluing single layer pneumatic cloth; striker pneumatics as an example 

Ironed, trimmed and ready for the top cover. 

 Section finished. Glue tested for bond, and cover plate installed.


Following are the steps involved in re-leathering valves and replacing worn pouch leather.

The valve seat pictured is typical of the debris and dust that accumulates over 80+ years. Brass valve seats, top and bottom must be polished. I use 0000 steel-wool for best results.

When the valves get into this state, you can see why re-leathering and seat polishing are an important issue. This valve in this condition, could never form a proper seal.

With the valve now re-faced with new leather and the seats polished, a proper seal may be performed by the valve. Valves are one of the most neglected aspects of restoration and as you can see, condition is of extreme importance.

 The old pouches and gaskets have deteriorated, these worn leather items must be replaced. Equally ignored on many occasions, pouches are also vital to the proper functioning of the pneumatic system.

 Only the finest grade of tanned pneumatic pouch leather should be used.  A dish must be formed in the leather to allow maximum upward movement to activate the valve. I use a coin to place the leather into the well and then unfold it onto the glue ring. This assists the dishing, and stops glue trailing onto the working section of the pouch. There are pouch setting tools available from suppliers.

After drying, I use beaten egg white to seal the leather. Albumin is a natural sealant that will not cause leather deterioration over decades and is the original seal used by many player manufacturers.

 Test the function of the valves by lightly blowing into a hose attached to the nipple, make sure that the bleed cups are clear (shown at bottom of photo). Ensure that the hot hide glue is holding fast.

Never knowingly seal in a problem. I guarantee that by sealing it in, it will not repair itself. 

 The bleeds, pictured above, are a small channel with restricting cup leading from under the pouch, that allows air, after inflation of the pouch, to be bled into the vacuum chamber of the device. They are designed to cause rapid deflation of the pouch. The bleeds must be clean and clear so that repetition of the valve is not adversely affected, causing slow deflation of the pouch. Be careful not to accidently enlarge the hole in the cup when cleaning, too large an opening can cause the pouch to stall, unable to inflate as intended. 

 Box completed, tested and ready to re-install.

Rach Prelude.mp3

Make a free website with Yola